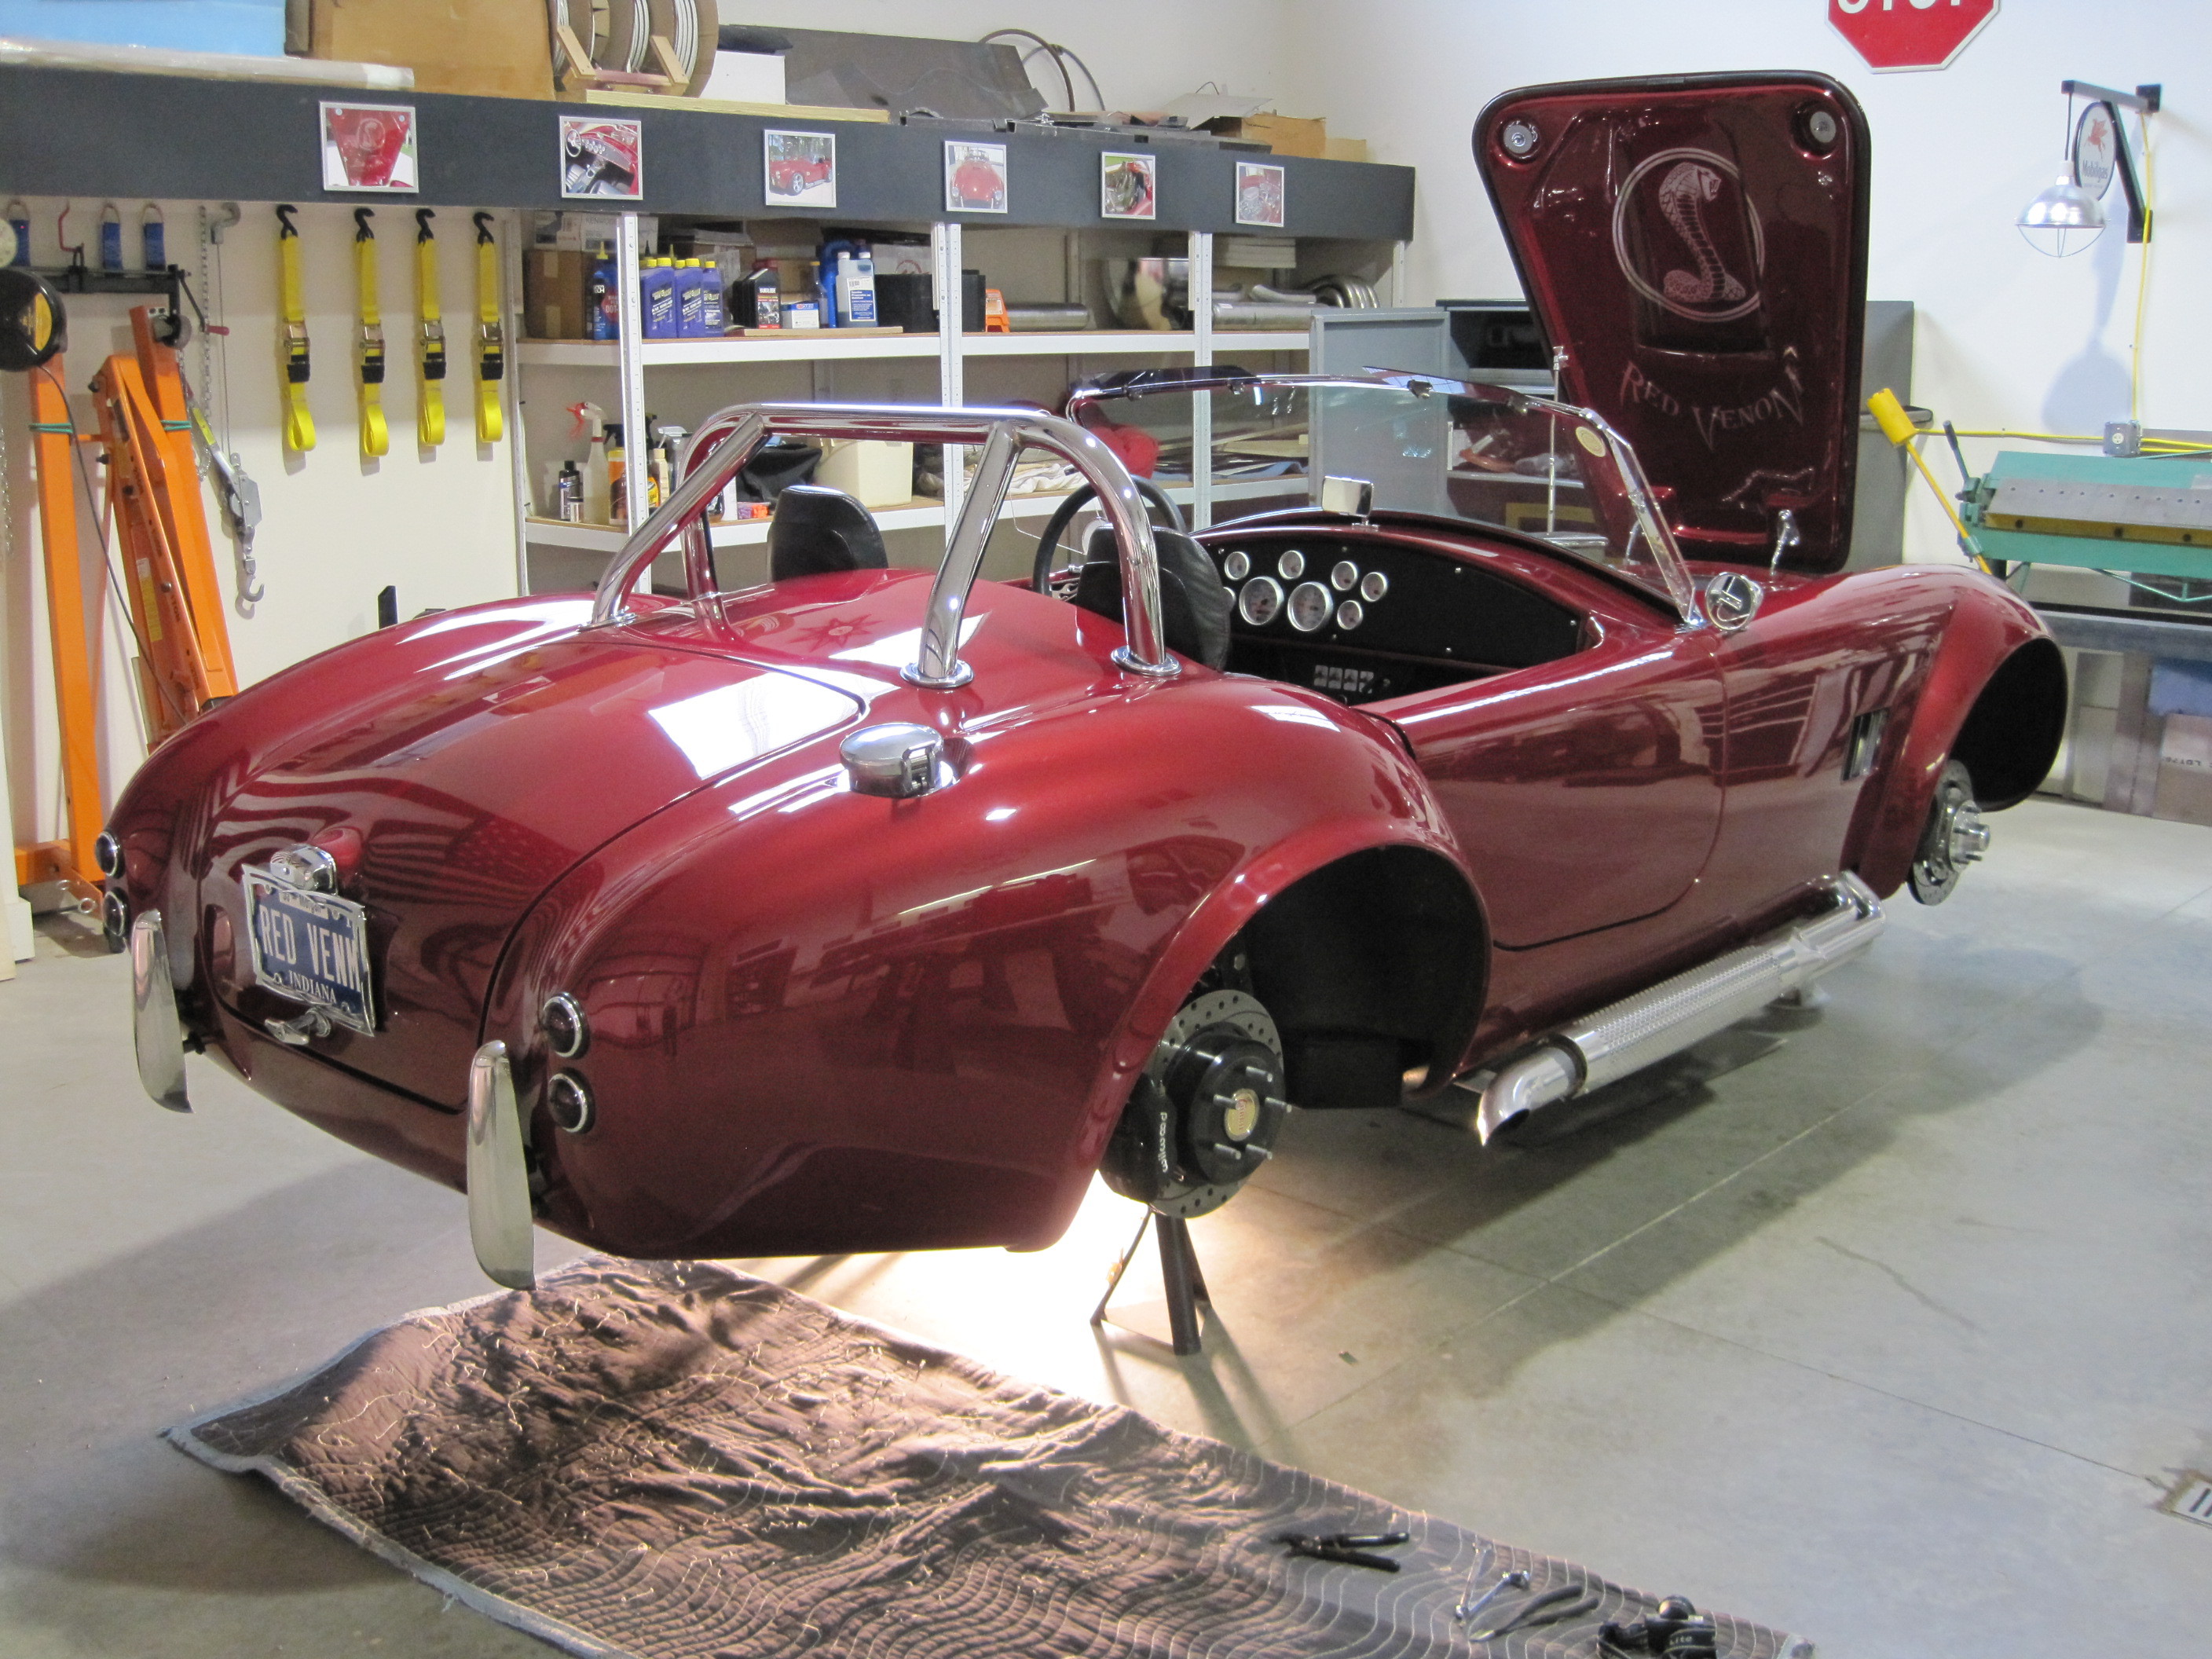
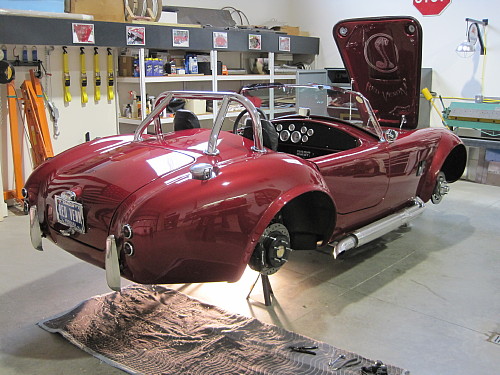
The winter time in the Midwest
is NOT a time to go cruising. I pretty much clean up the car and put
the cover on it around November 1 until April 1. This down time is a
great time to make minor tweaks to the car to correct any construction
defects or just change your mind on something.
Fuel Tank
The fuel tank leaks fuel when it
is full. I suspect it is the fittings in the top of the tank that are
leaking. So the first job is to remove the fuel tank from the car and
check those fittings.
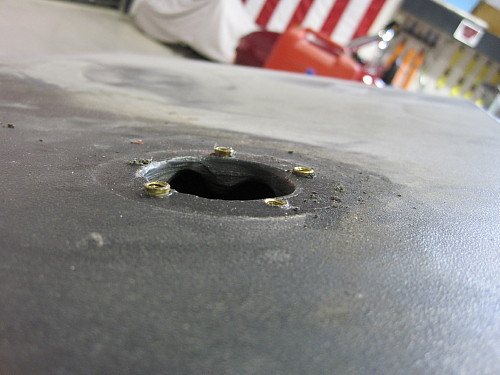
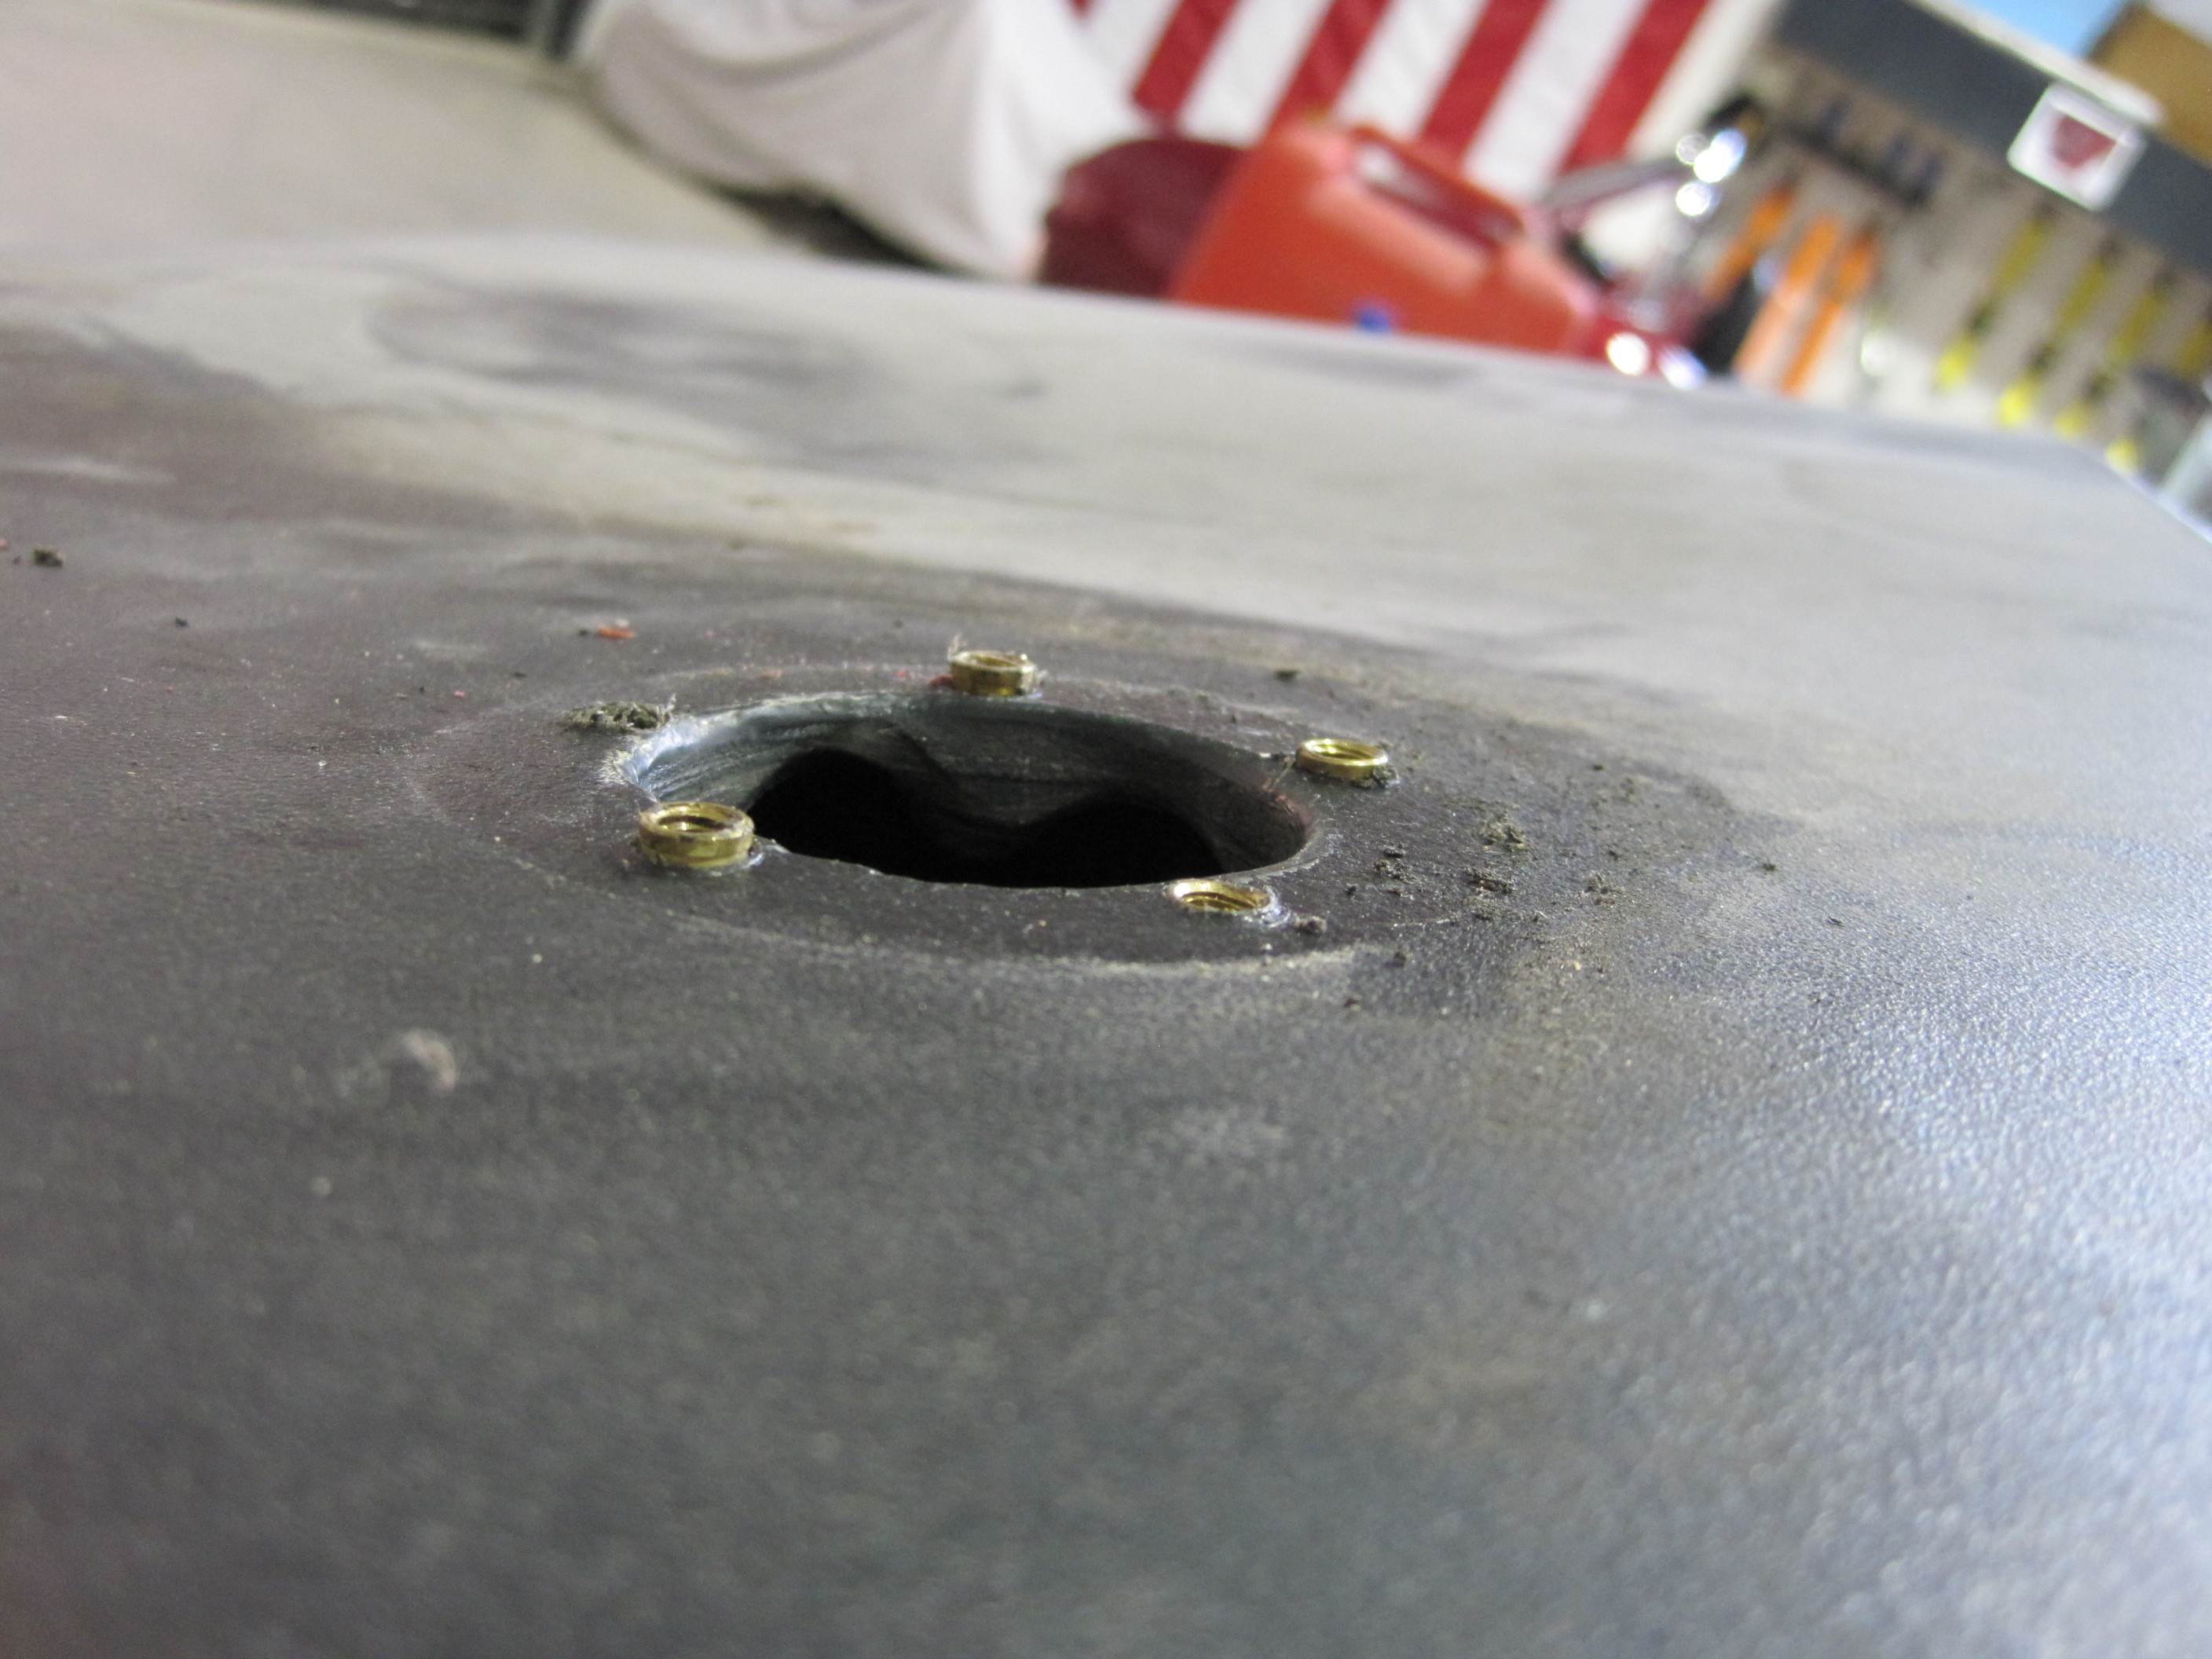
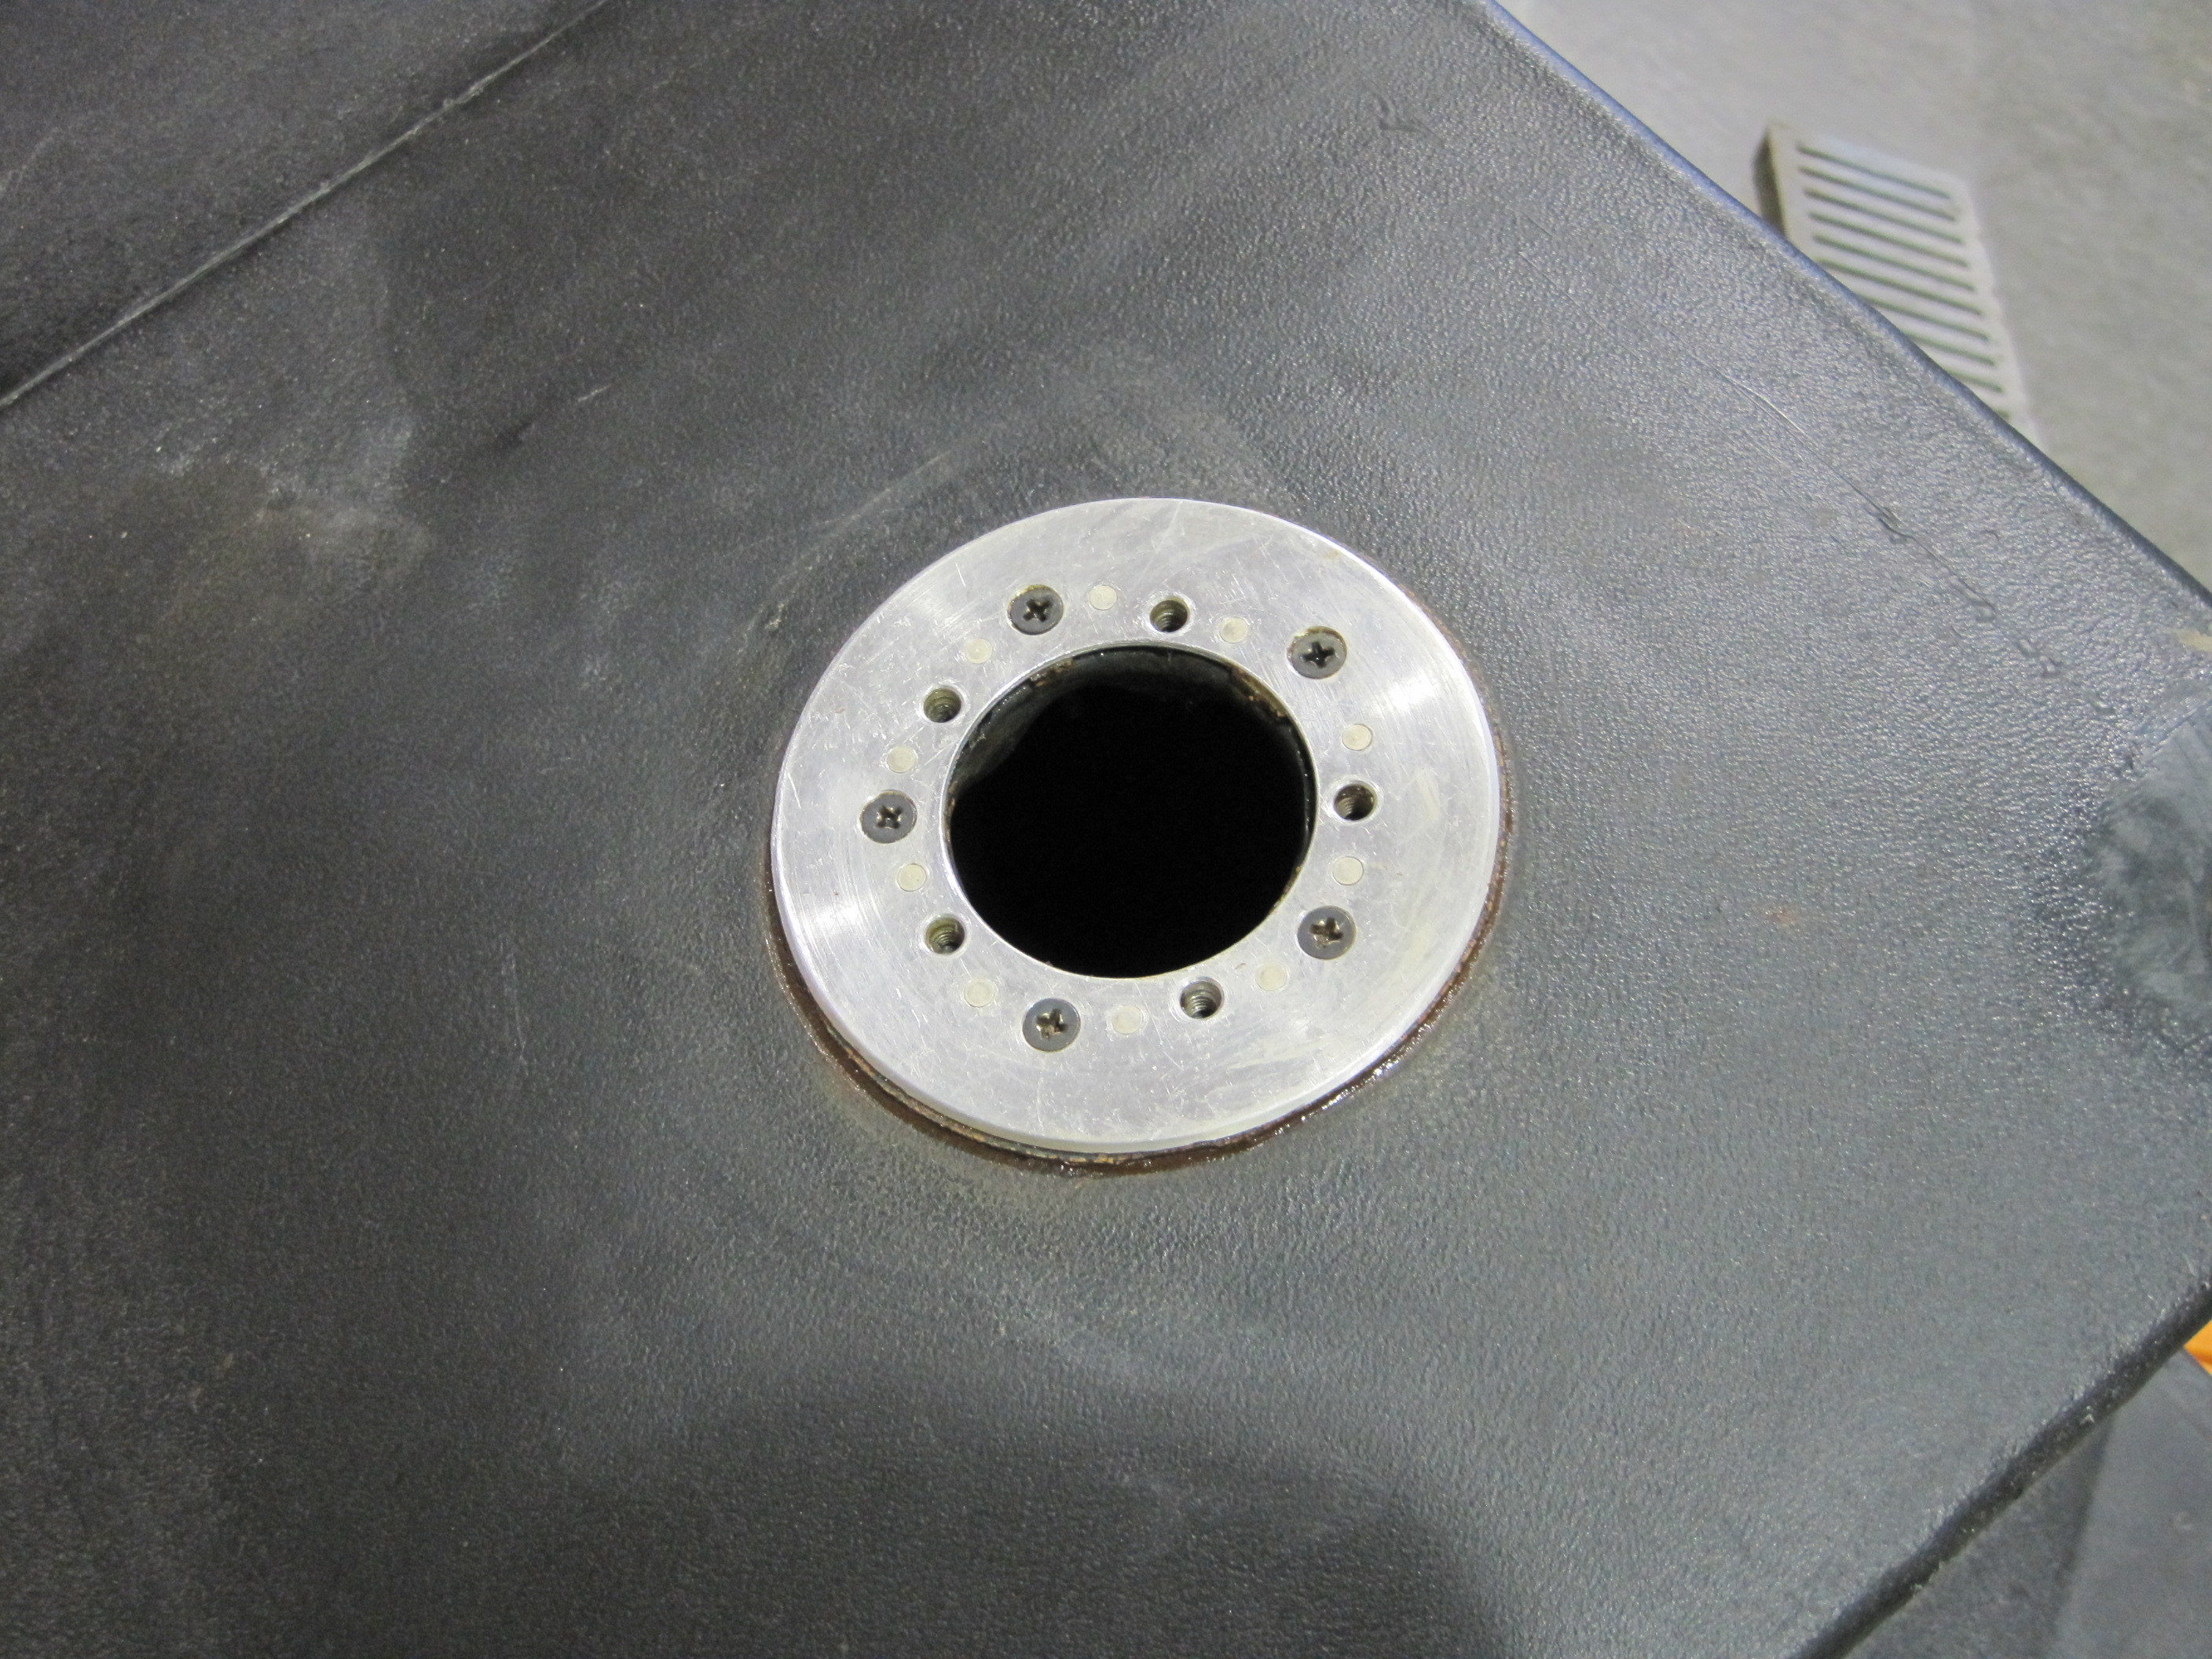
Surprise! When I removed
the tank the fuel tank level sender was sticking up about 1/8" above the
surface of the tank top. Seems the tank flexed and managed to use the
fuel sender as a lever to pull the nutserts right out of the plastic.
this is a picture of the nutserts once I pulled the sending unit. The
other fittings on the tank were not leaking so I didn't mess with them.
I suspect that this damage
happened when I hit a railroad track crossing that was surprisingly bumpy
when i was going too fast. I remember hitting it and it was quite a
jolt. I'm guessing that had something to do with this.
I spent a little bit of time
figuring out how to fix this. I wasn't thrilled about buying a new
tank and I don't have the time to build one out of aluminum, so fixing this
one is the answer somehow.

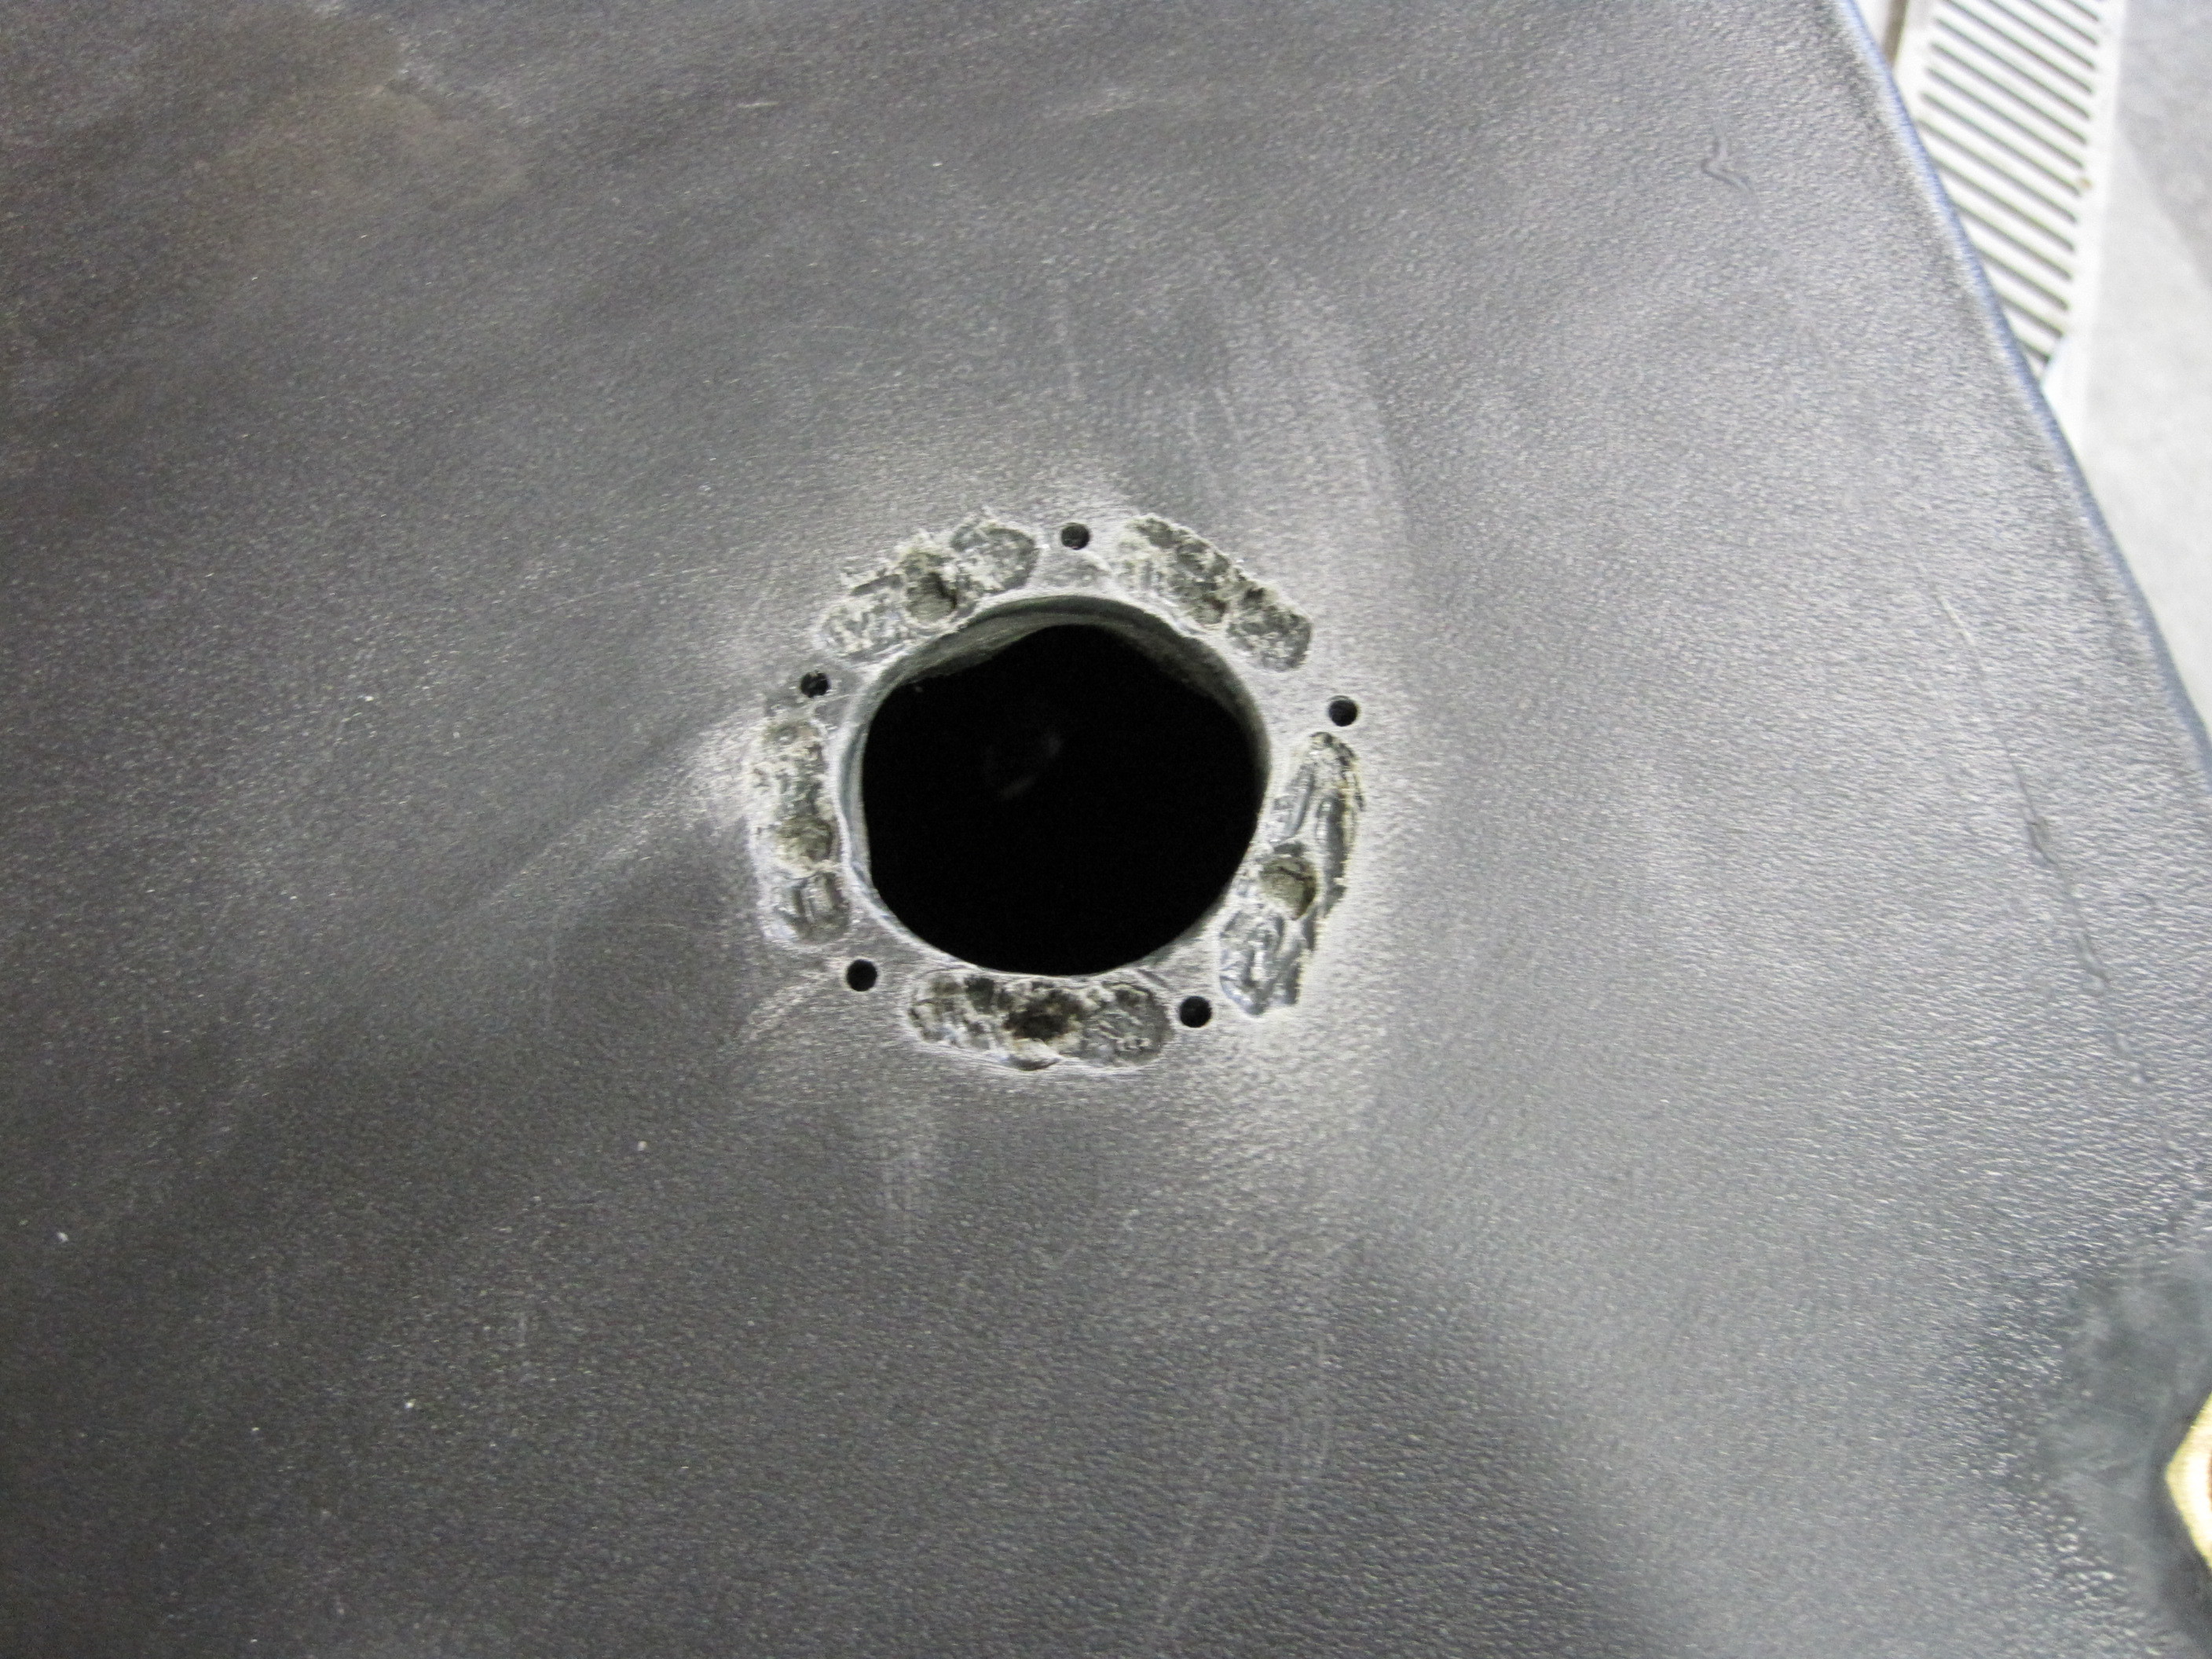
I decided to build a mounting
ring out of aluminum and nutplates and seal this to the top of the tank.
I first used my Dremel tool to cut recesses in the top of the tank where the
ring will sit. I had to be carefull to not cut through the top of the
tank in order to lessen the chances of this leaking.

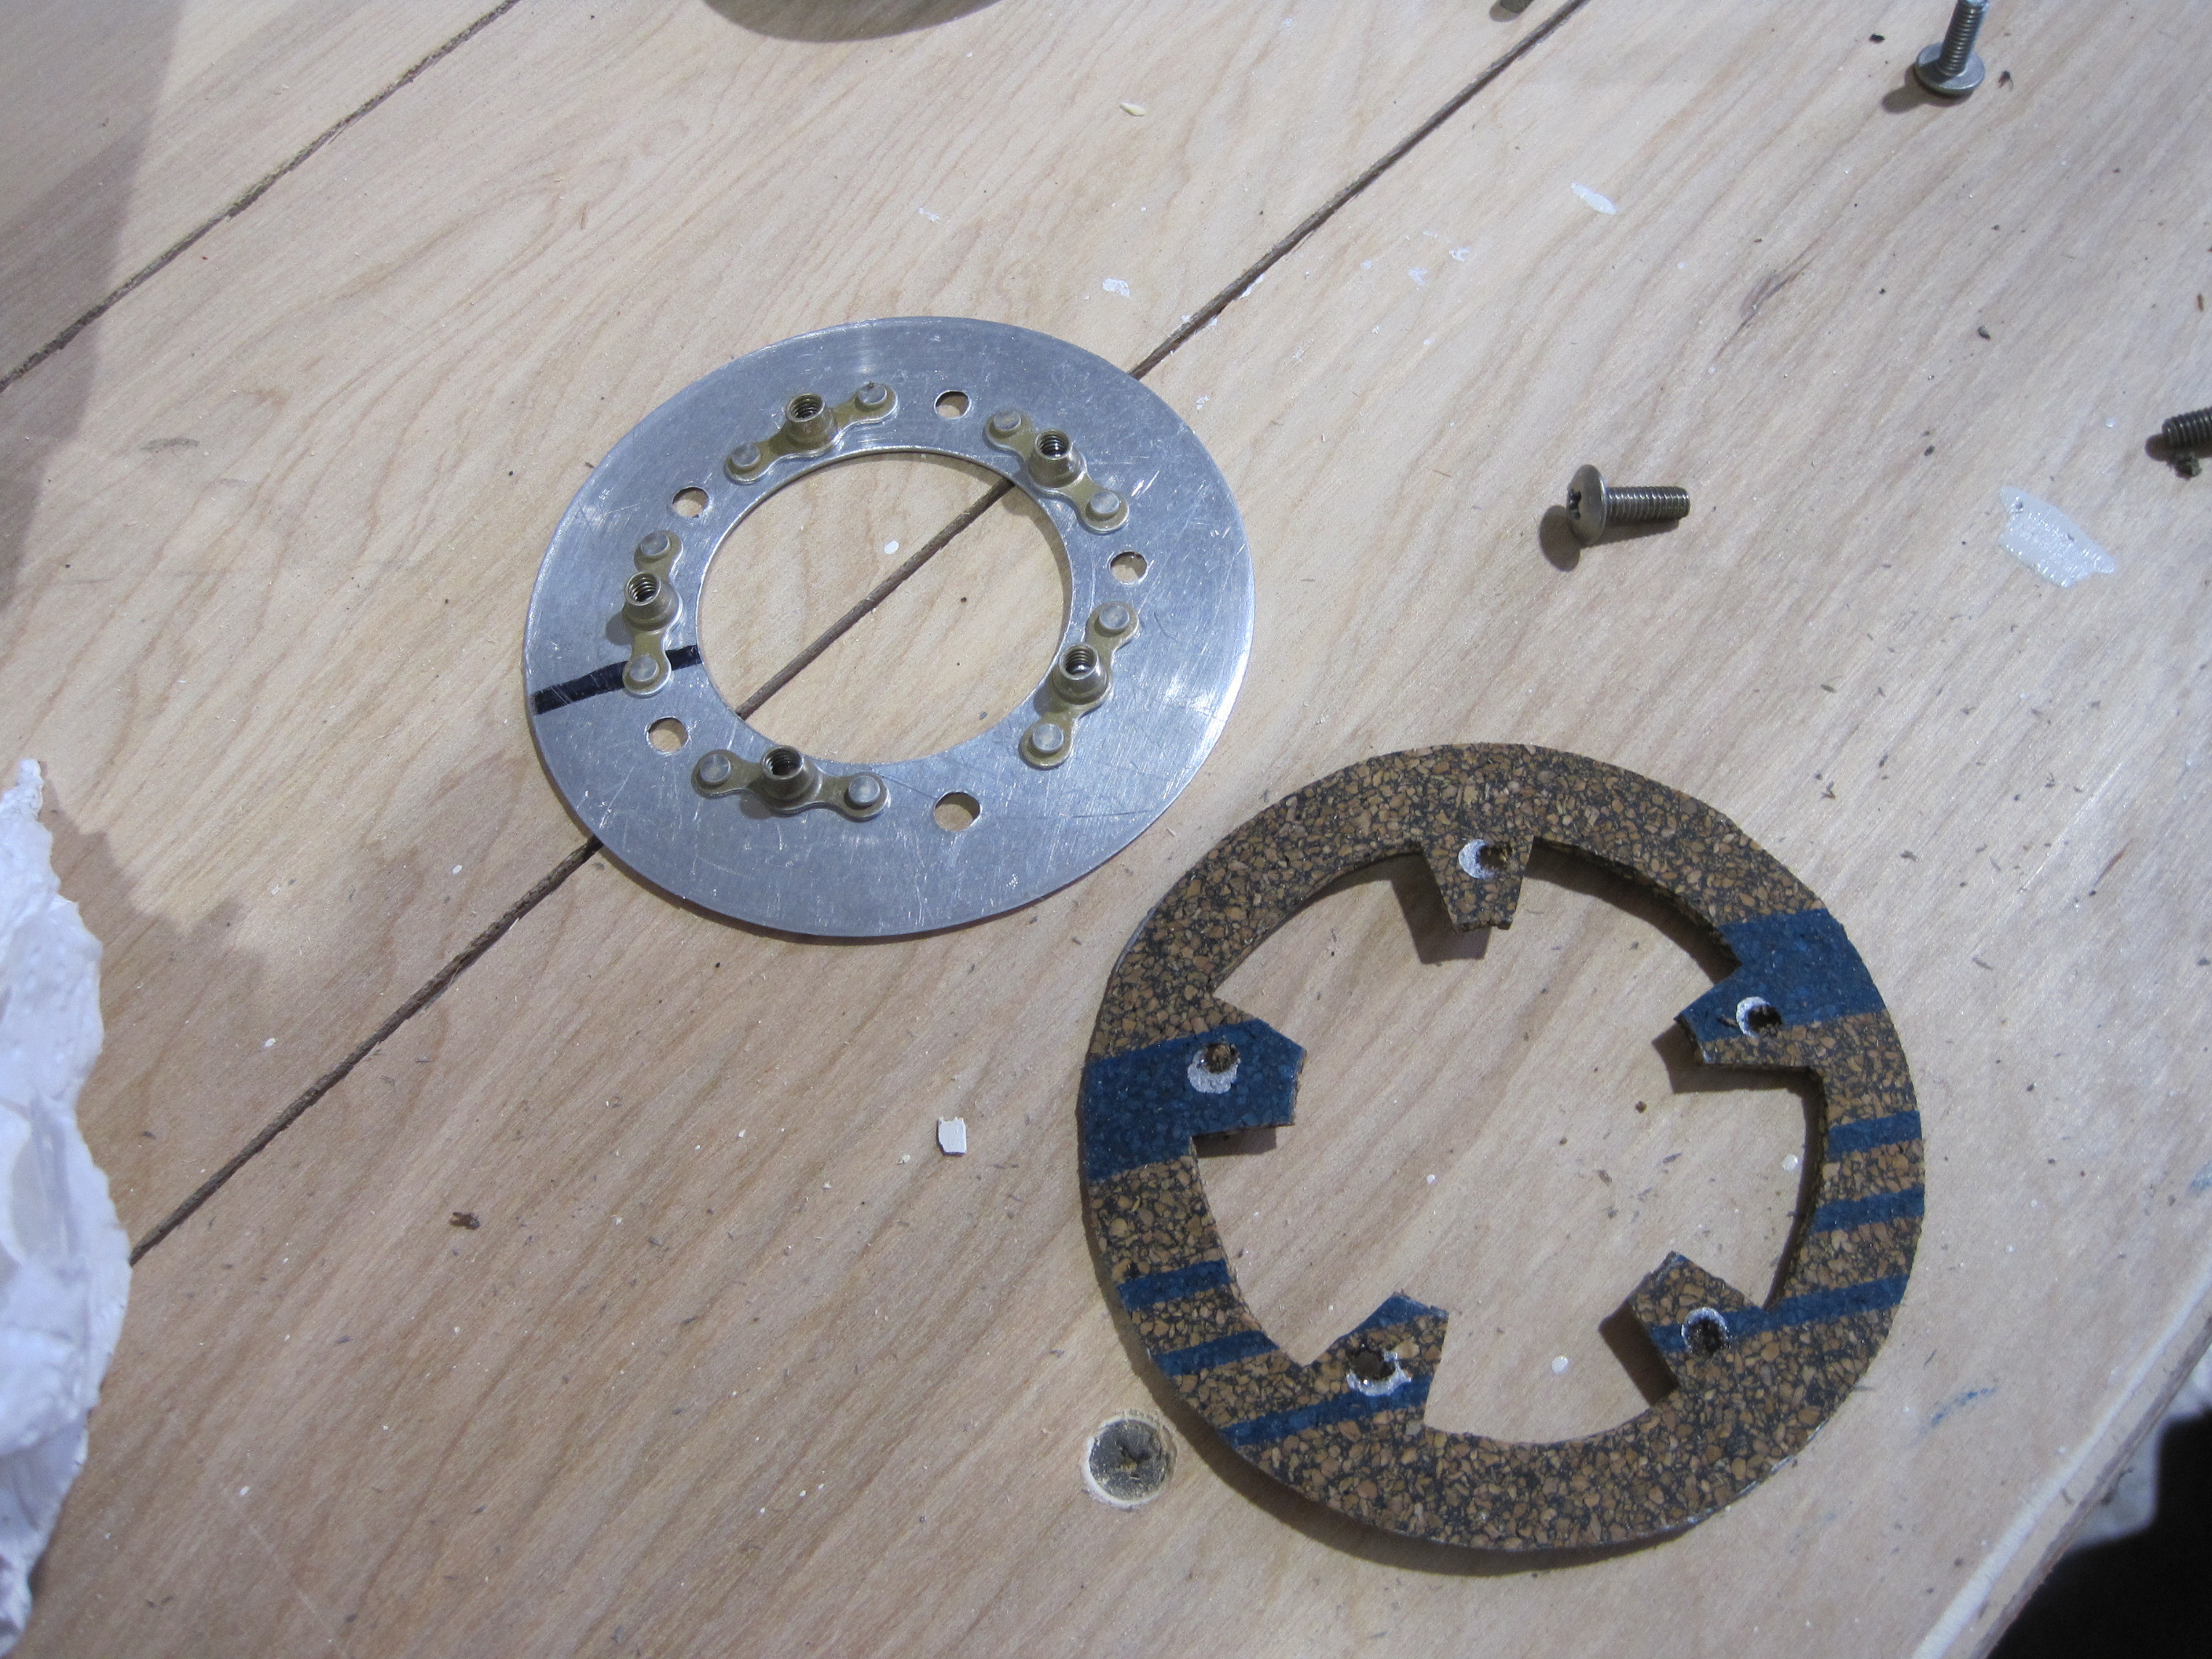
This the reinforcing ring and
gasket that I made. I riveted nutplates to the ring to attach the
sending unit. The holes are countersunk on the other side and will be
used to mount the ring to the tank. With this gooped up with sealer,
it shouldn't leak.
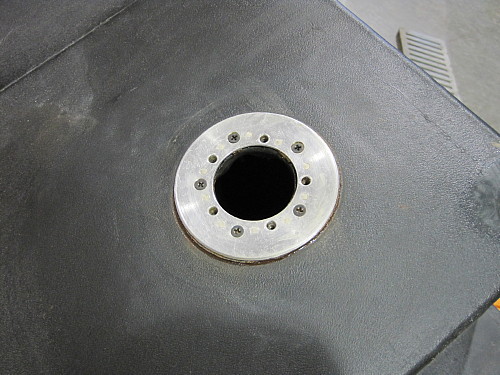
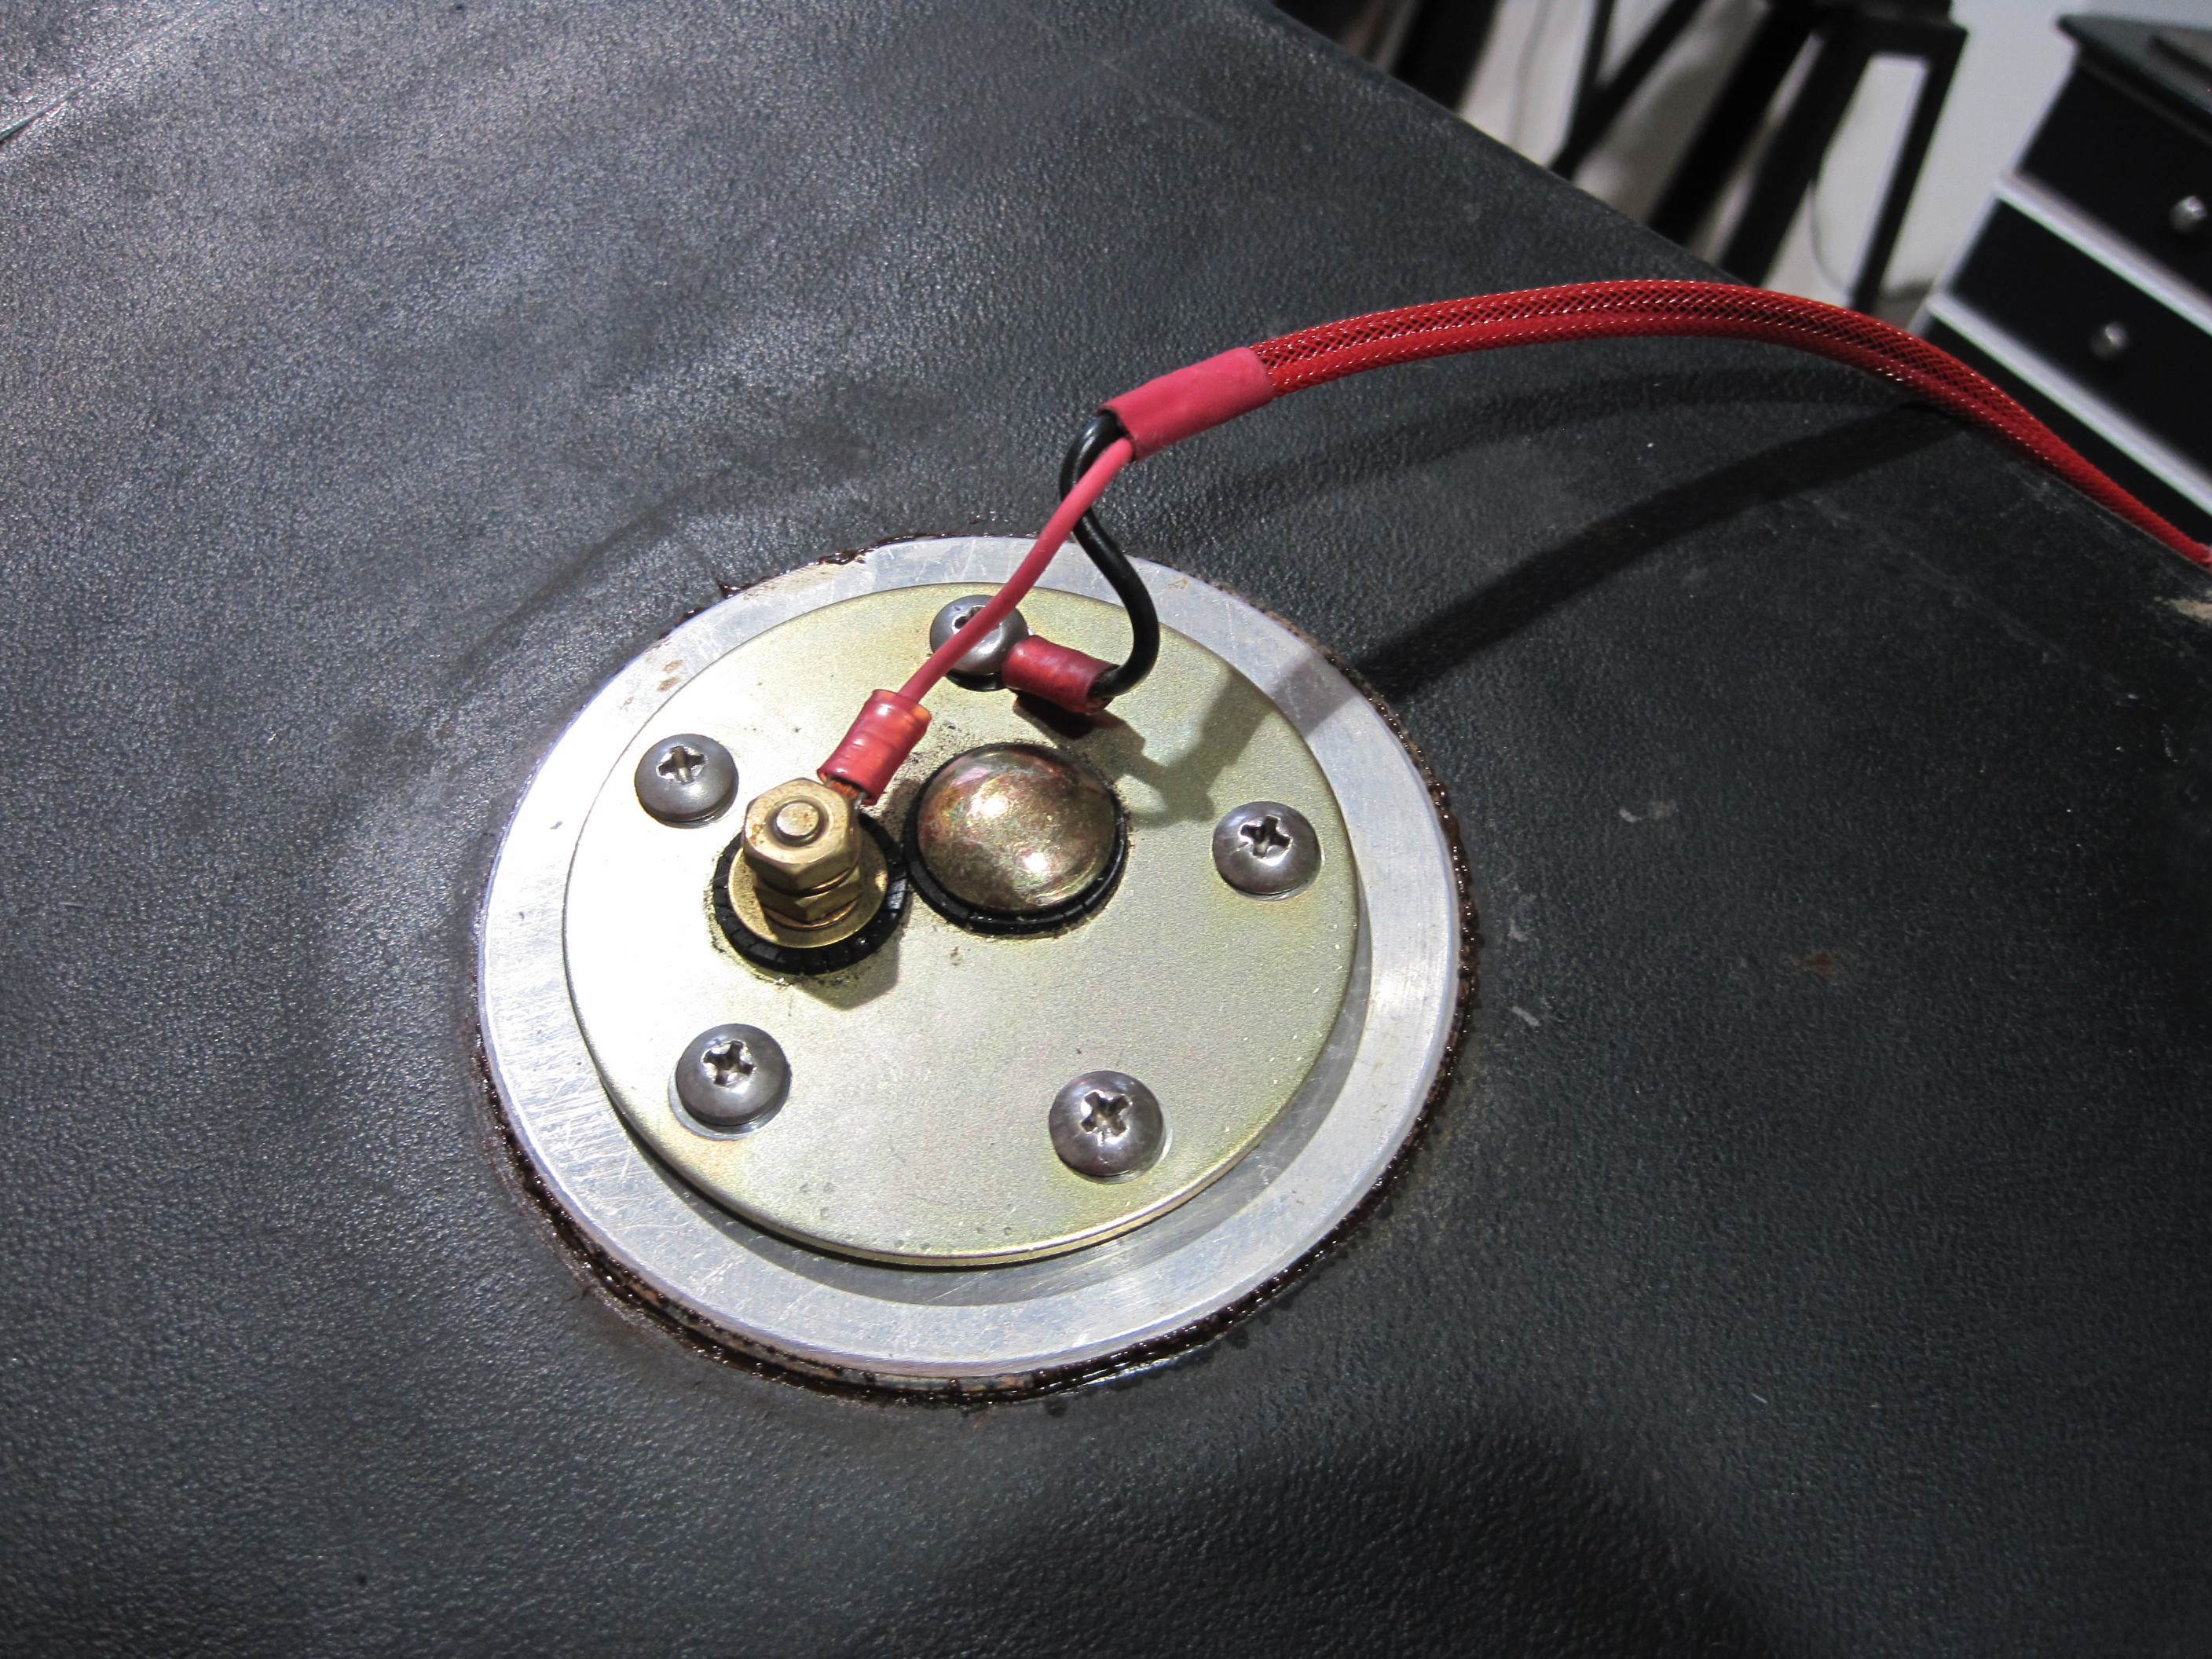
Here is the ring mounted to the
tank top. The four flush screws go through the tank and are held on by
washers and nuts inside the tank. I then gooped over them with sealer.

The nutplates on the reinforcing
ring are then used by the hold down screws to attach the fuel level sending
unit to the tank top. This is the best I can come up. I'll drive
this for another year to see of it holds up but I will not be surprised if I
have to pull the tank next Winter.
Bump Stops and Rear End
Vent
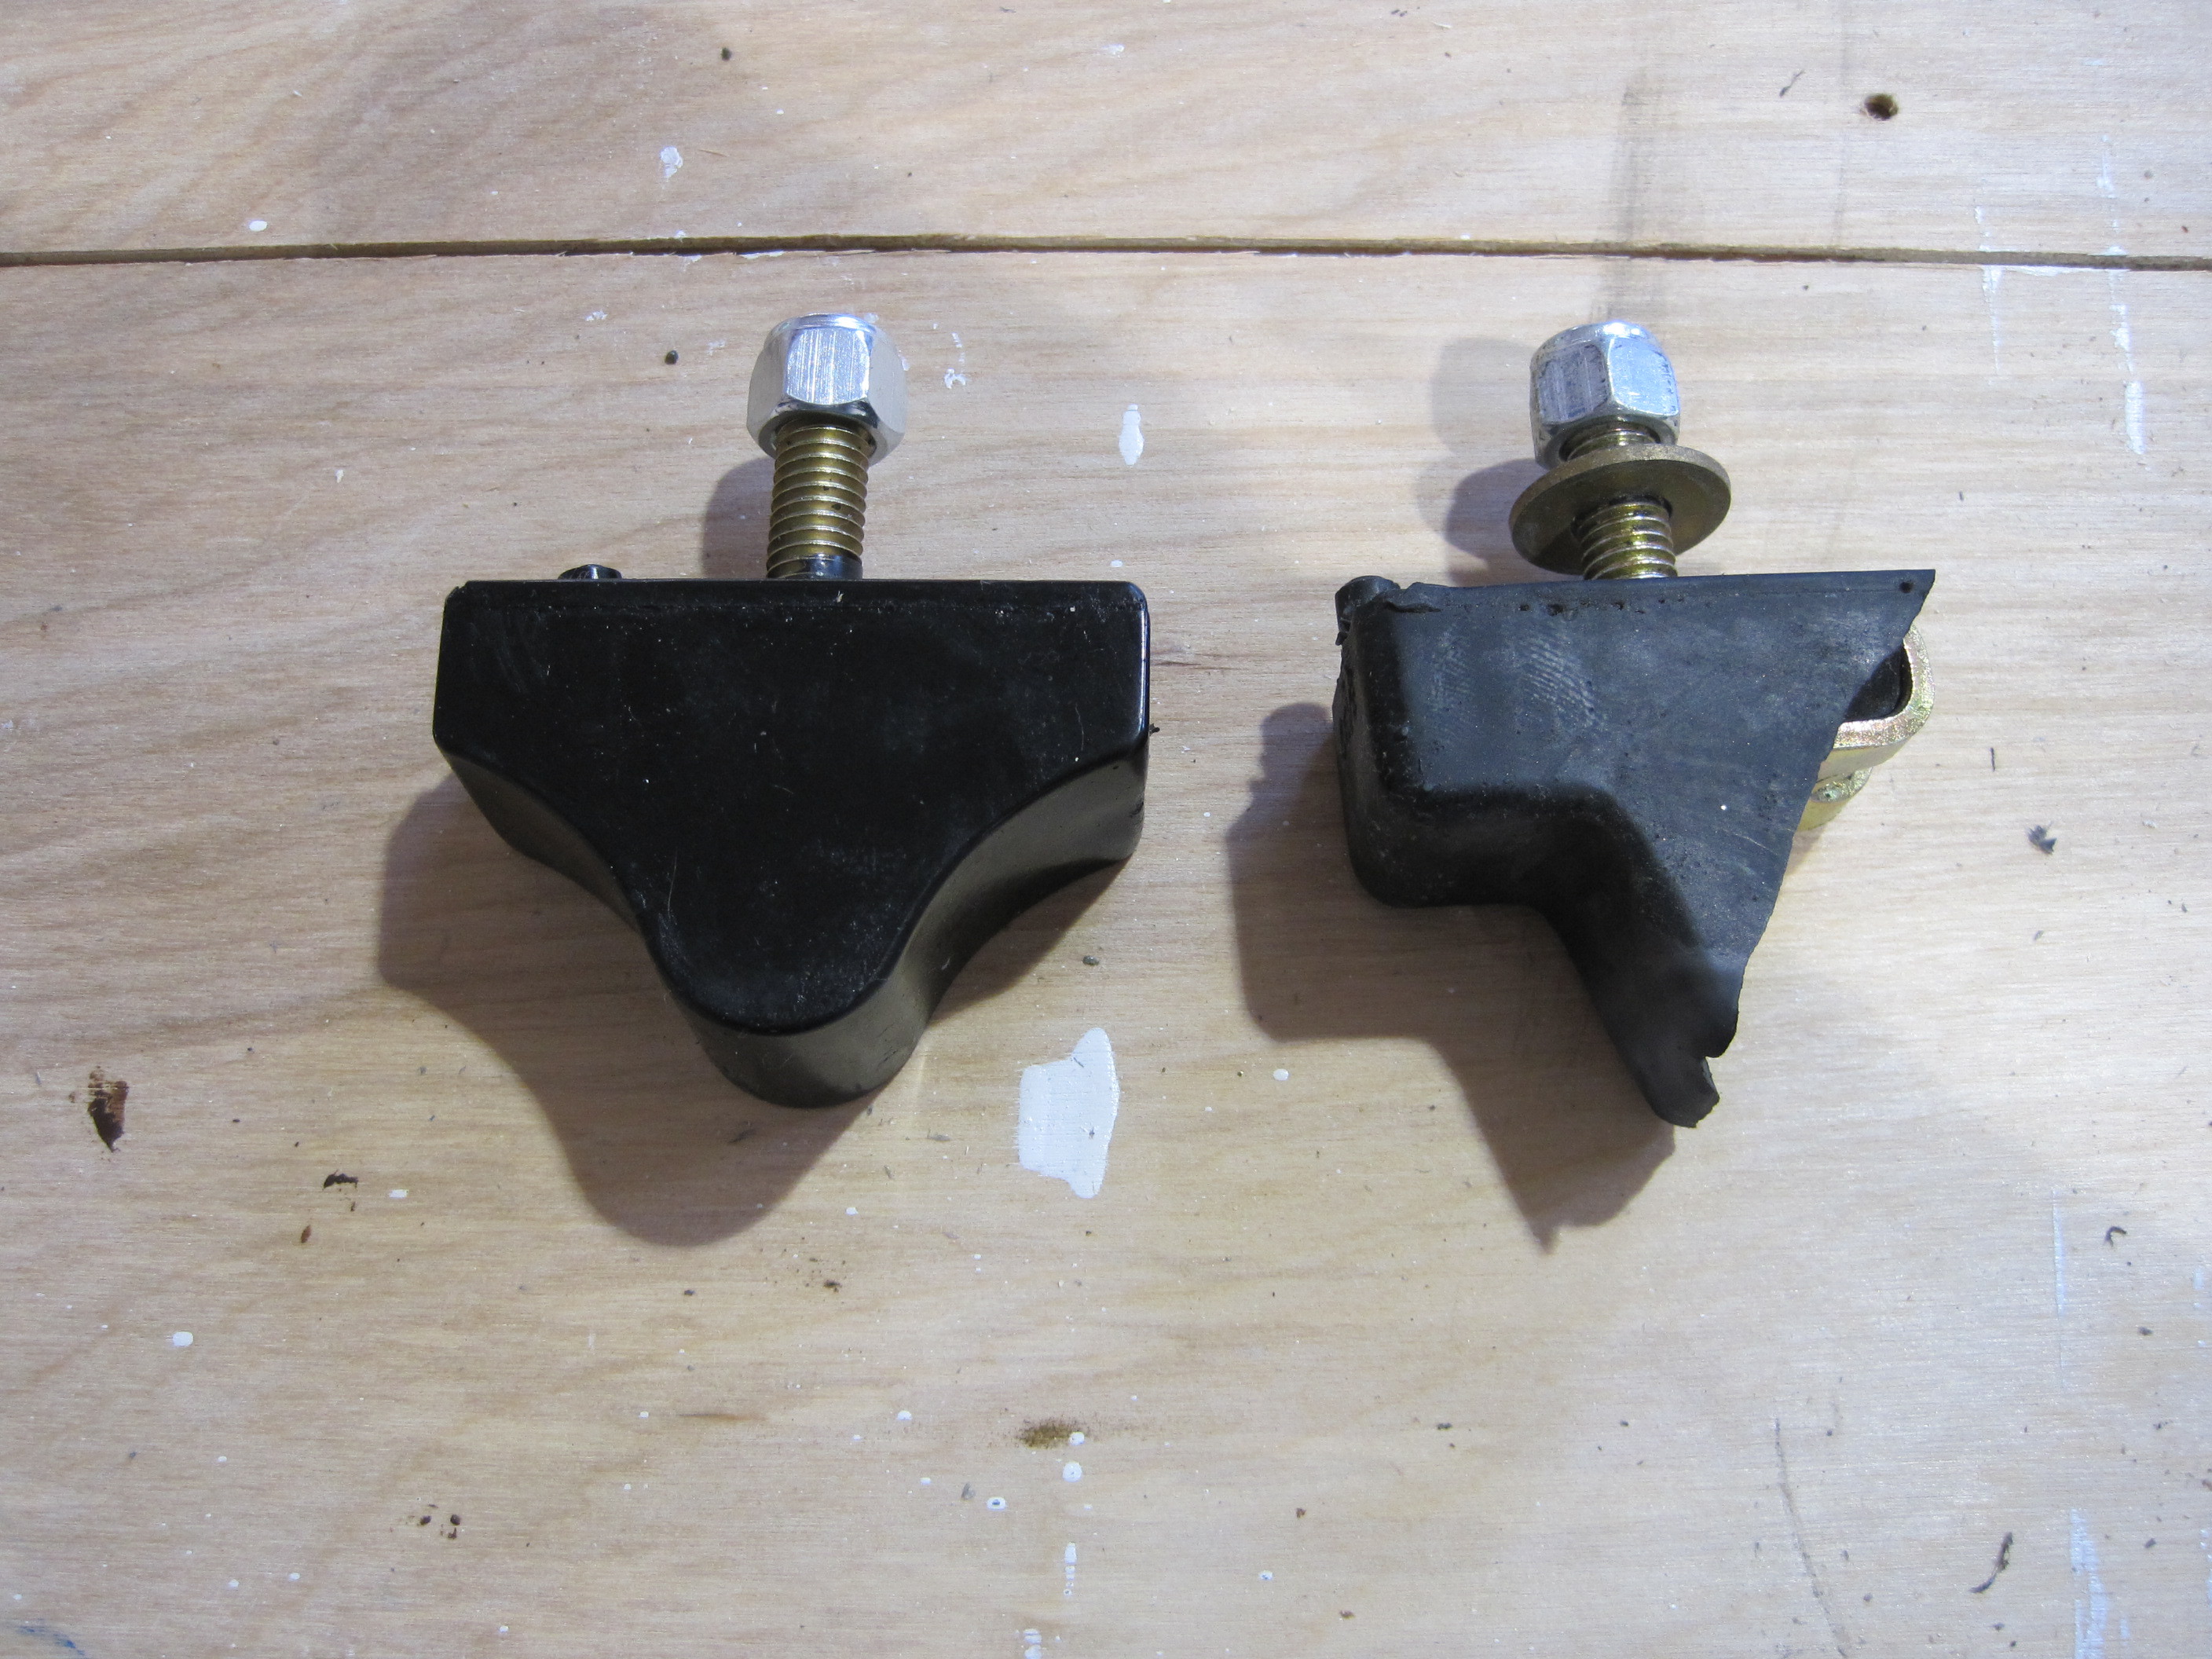
I was very surprised to find
both of my rear-end bump stops broken off when I was under the car removing
the fuel tank. Again, I bet it was the hard hit on those railroad
tracks that did them in. These are the ones that come with the kit and
they are made of rubber. It was suggested at the time of construction
to upgrade these but I chose not to. Well, I guess that was a mistake.
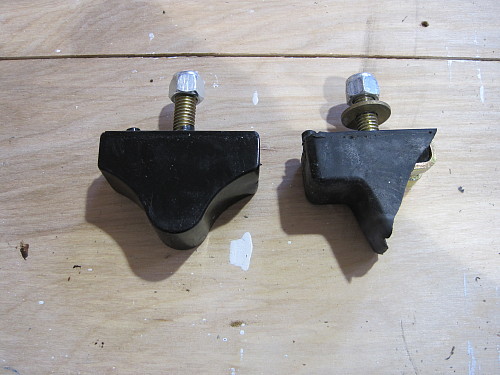
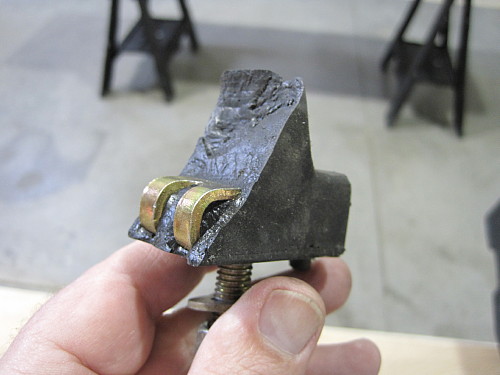
I ordered a set of polyurethane
bump stops with the exact same dimensions from Summit and bolted them in
place. It was an easy fix.
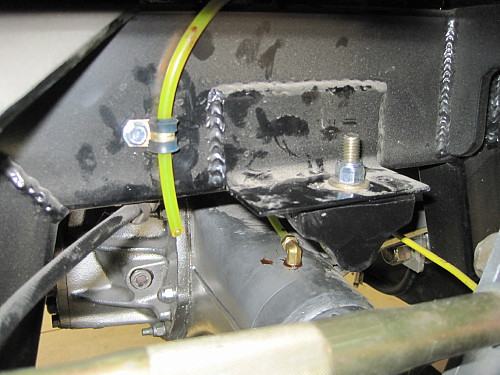
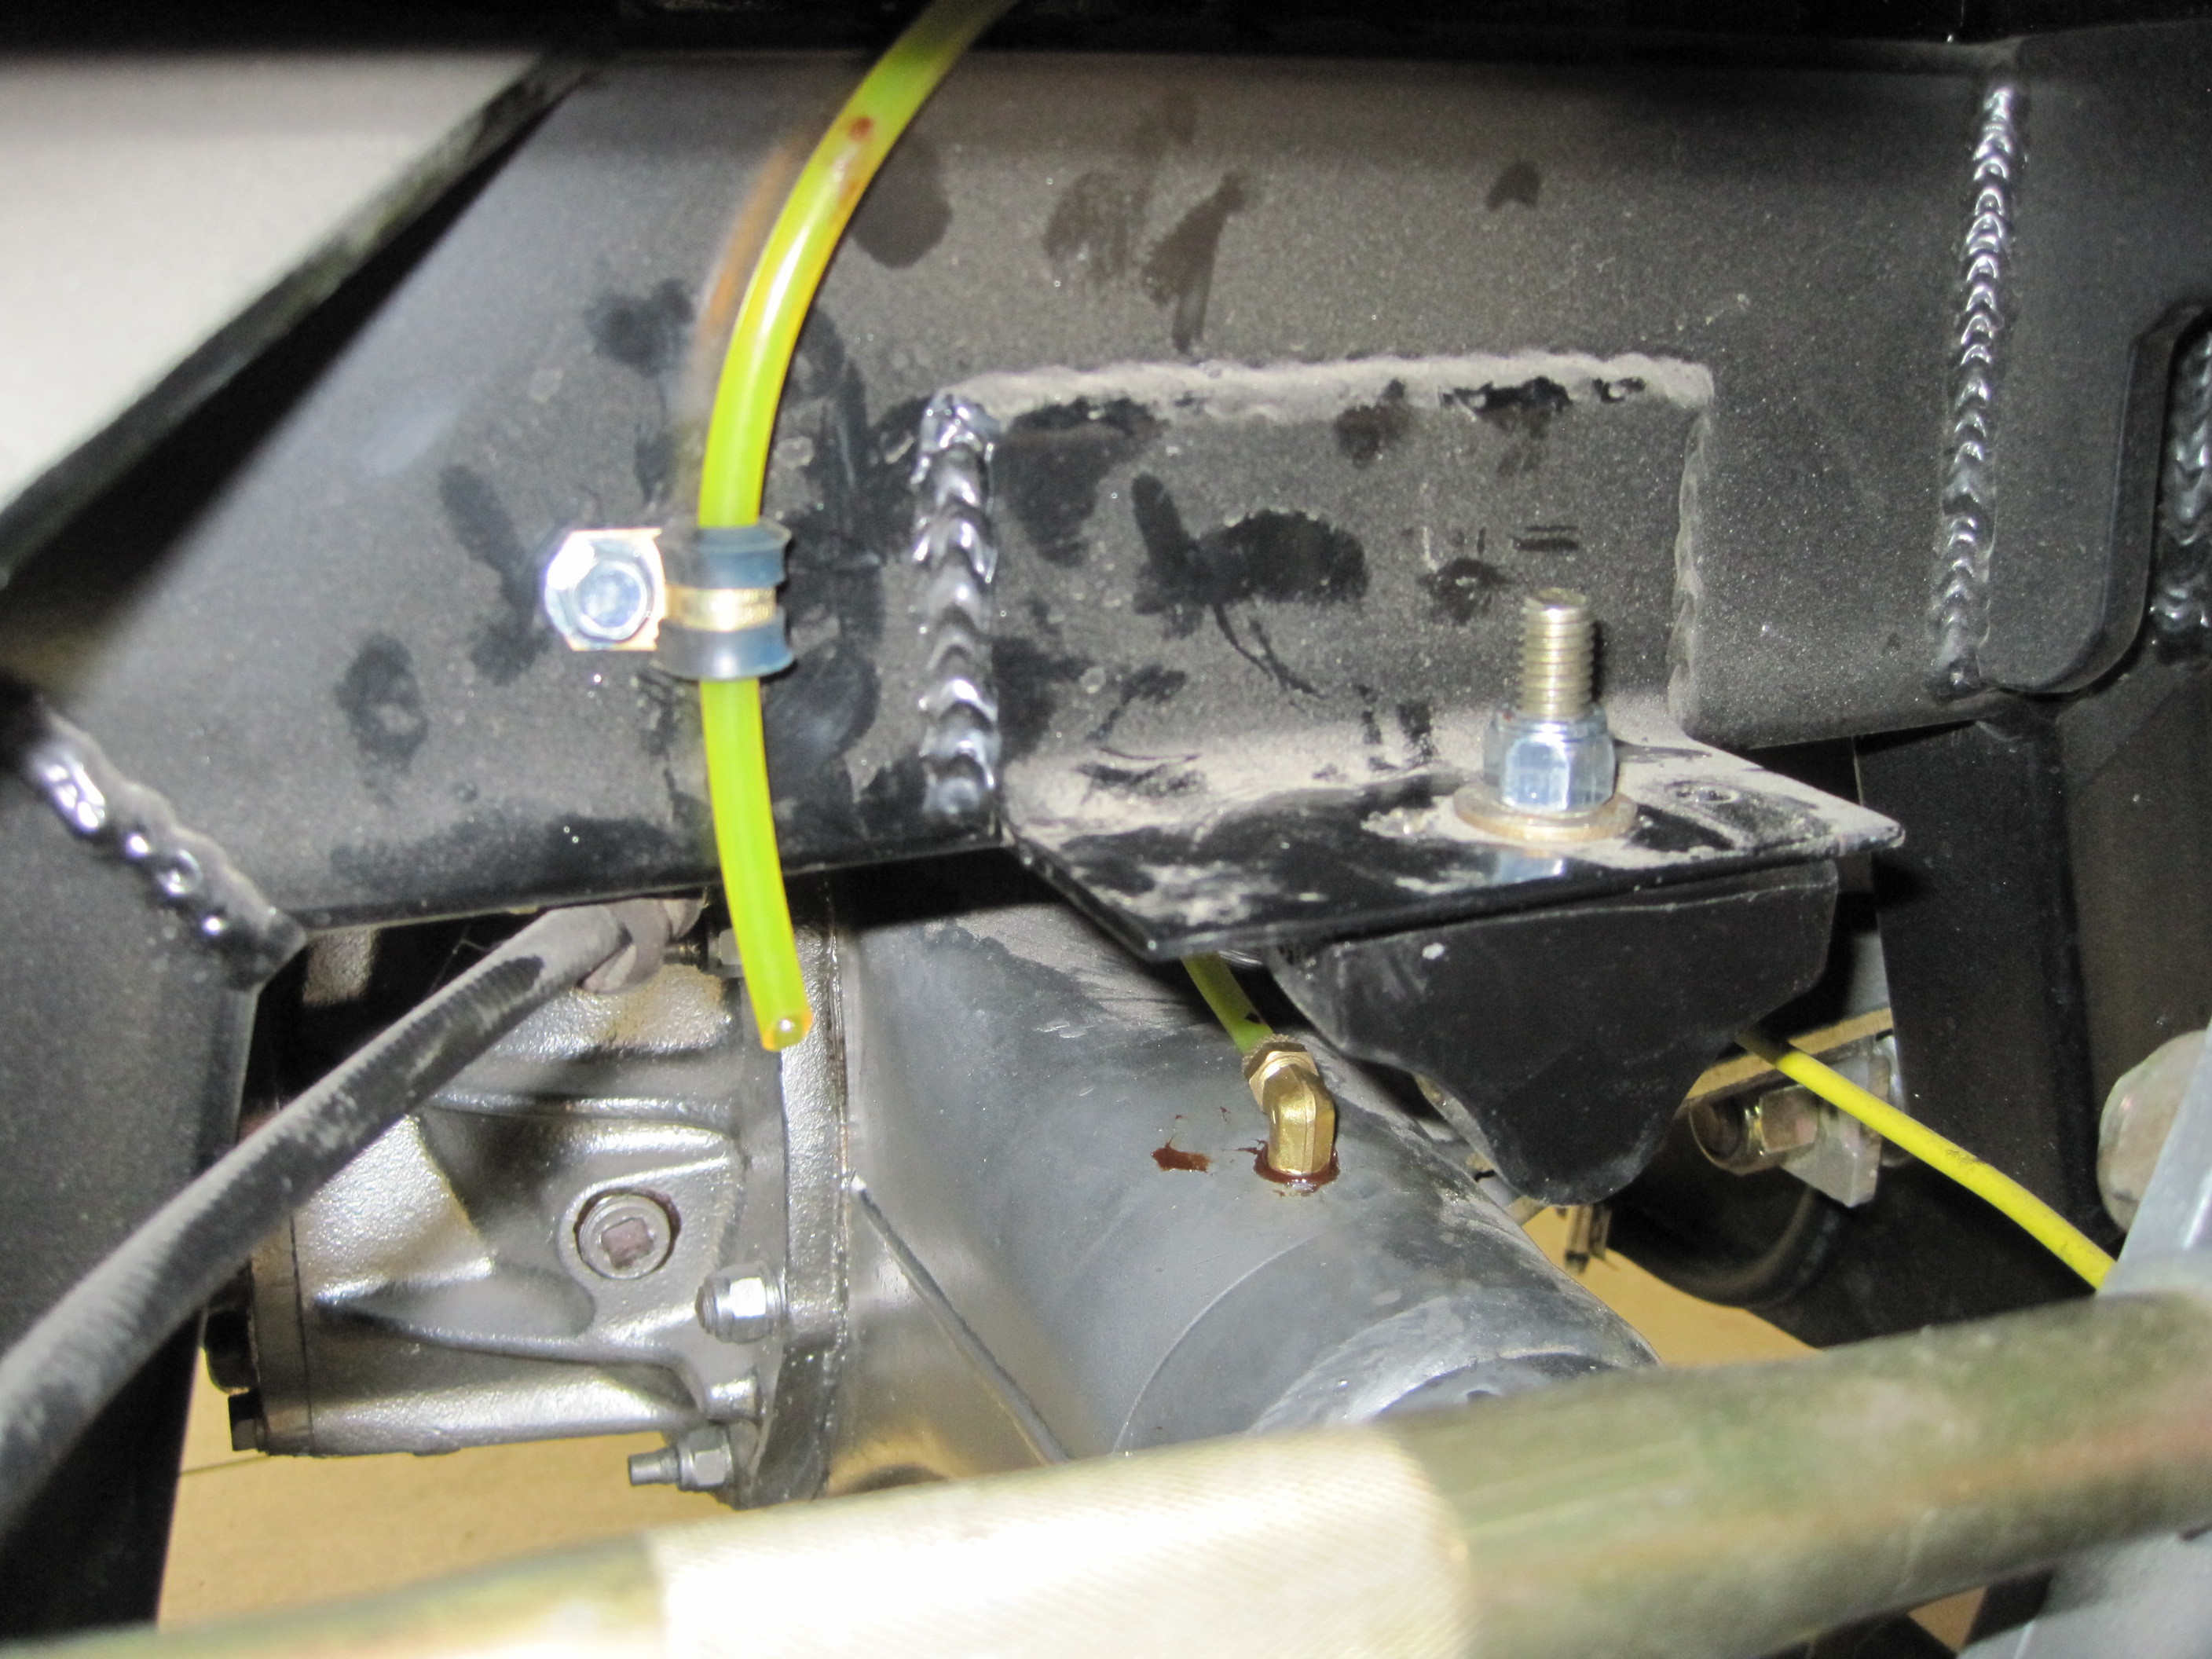
When replacing the bump stops, I
also noticed that the vent for the rear end had broken off flush with the
top of the housing. I could see where the straight tubing fitting that
came with the rear end had hit the frame rail above it. After removing
what was remaining of the old fitting, I installed an elbow fitting which
provides much more clearance under the frame. I then routed a hose up
and over the frame and secured it with a clamp.
There are more changes.
They can be found on the next page.
|